Fall 2026 Fine Art Catalog Is Here




261 - Free South Africa (#2), 1985
Price on Request
Details
Medium: hand-signed lithograph on Rives BFK paper
Year: 1985
Edition: 82
Sheet size: 32 x 39.37"
Image size: 30.25 x 37.87"
Framed size: 37 x 44.5"
Signature: signed and dated 'K. Haring '85' and annotated vertical lower right
Year: 1985
Edition: 82
Sheet size: 32 x 39.37"
Image size: 30.25 x 37.87"
Framed size: 37 x 44.5"
Signature: signed and dated 'K. Haring '85' and annotated vertical lower right
About the Work
"Free South Africa (#2)" is a lithograph created by Keith Haring in 1985 for his series 'Free South Africa.' From the edition of 82, the artwork is signed and dated 'K. Haring '85' and annotated vertically lower right. The artwork is framed in a contemporary white frame and has a framed size of 37 x 44.5". The artwork ships framed and accompanied by a certificate of authenticity.
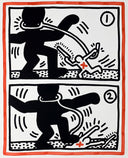
Keith Haring’s "Free South Africa" series still feels startlingly direct because it does not ask viewers to decode a complicated political message. It stages power as a physical struggle: one body pulling, another resisting, both locked inside a tight frame of motion, pressure, and consequence.
In this horizontal print, a large black figure strides across the image while a much smaller white figure is caught underfoot. The white figure bears a red “X” on its body and holds what looks like a lasso or rope around the neck of the black figure. That detail is essential. The image is not simply a reversal of dominance, with one figure defeating another. It shows a system under strain: the smaller figure still trying to control the larger one, even while being overwhelmed by the force of resistance.
Haring’s use of scale makes the message immediate. The black figure is monumental, active, and moving forward. The white figure is smaller, frantic, and losing control. The rope around the neck suggests the violence of restraint, while the red “X” reads like a mark of danger, injury, or cancellation. Haring compresses the reality of apartheid into a scene that is almost cartoon-like in its clarity, but not simplistic. The print understands that oppression often depends on an impossible contradiction: a minority holding power over a majority, and using force to maintain that imbalance.
What keeps the work relevant today is not only its original anti-apartheid context, but the way it speaks to broader questions of control, visibility, and resistance. We still live in a world where images move quickly, where protest signs, murals, and digital graphics can shape public feeling almost instantly. Haring understood that kind of visual speed before the internet made it ordinary. His figures are bold because they need to be read fast, remembered easily, and felt before they are explained.
Seen now, "Free South Africa" does not need to be flattened into a general political slogan. Its power lies in how specifically it shows the mechanics of domination: the tug at the neck, the pressure of the foot, the body in motion, the instability of a system built on coercion. It reminds us that struggles for dignity are not abstract. They are lived in bodies, in public spaces, and in the daily refusal to remain controlled.
This print remains fresh because it does what the strongest graphic art can do: it turns a historical crisis into an image that still feels active. Haring gives us a scene of conflict, but also one of momentum. The work does not simply look back at apartheid; it asks us to recognize how power operates, how it is challenged, and how visual culture can keep that challenge visible.
About the Artist
261 - Free South Africa (#2), 1985
Regular price
$98,500.00
SELECTED WORK
MORE FROM THIS ARTIST
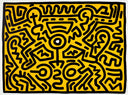
Growing #3, 1988
Price on Request
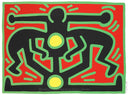
Growing #2, 1988
Price on Request

"People Ladder" (Three Lithographs), 1985
Price on Request
261 - Free South Africa (#2), 1985
Price on Request


Untitled (Pop Shop IV - D), 1989
Price on Request
262 - Free South Africa (#3), 1985
Price on Request
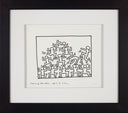
Drawings for Paris Review, 1982
Price on Request
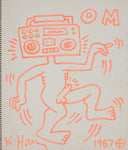
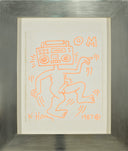
Untitled (orange drawing), 1987
Price on Request
Start your collection with guidance you can trust
For nearly 50 years, we’ve helped new collectors find artwork they love and understand the stories behind each piece. Our gallery consultants offer personalized guidance, whether you’re exploring originals, limited editions, or discovering an artist for the first time. Visit your nearest gallery to start collecting with confidence.

Frequently Asked Questions
Your artwork comes with a Certificate of Authenticity (or Letter of Authenticity), professional packaging, and insured delivery.
We ship fully insured, using trusted carriers. Each piece is professionally packed to ensure safe arrival. Shipping times vary based on the location of the art, its destination, and whether or not it is framed (ready to ship) at the time of your purchase.
All our works come beautifully framed. Some print multiples may have framing options if we have unframed editions available in our warehouse. Our in-house framing provides high-quality moulding, acid-free materials and either UV plexiglass or framer’s grade acrylic. High value works may be framed in custom, closed-corner frames, and are often framed in Optium museum glass for enhanced clarity.
No, Martin Lawrence Galleries does not provide appraisal services. To ensure that appraisals are fully independent and unbiased, it is best practice for them to be carried out by certified appraisers who have not had prior involvement with the sale or handling of the artwork. For that reason, we do not appraise artworks that we handle, and instead recommend that collectors seek an independent, certified appraiser.
No, we own the vast majority of our inventory and do not seek out consignments from Sellers.
Yes, if you purchase from a local gallery, your consultant will be happy to assist you with hanging the artwork in your home.
Martin Lawrence Galleries has seven galleries across the country where you may be able to see the exact piece you are interested in. Print and sculpture multiples are more likely to be in several places for possible viewings whereas unique artworks will be constrained to one location. We are happy to facilitate your visit to one of our galleries if that is convenient for you. We can also take videos and extensive photos if a visit is not possible. Please contact us at martinlawrencegalleries.com.
We have over 50 years of experience, seven gallery locations across the United States, and a track record of connecting collectors with the right artwork.
No. Our consultants are here to guide you through the process, answer your questions, and make buying art simple and rewarding.
We encourage you to buy what you love. Our consultants will help you find the right piece that fits your taste and collection.
Please visit our page on specific instructions on how to take care of your artworks. Care Instructions
We stand by our artwork. Please review our detailed return policy here.
OUR GALLERIES

Costa Mesa, California
3333 Bear Street
949-759-0134
Mon–Sat: 11:00am – 8:00pm
Sun: 11:00pm – 6:30pm

Las Vegas, Nevada
3500 Las Vegas Boulevard South
702-991–5990
Sun – Thurs: 10:00am – 11:00pm
Fri – Sat: 10:00am – 12:00am
New Orleans, Louisiana
433 Royal Street
504-299-9055
Mon-Sun: 10am - 6pm
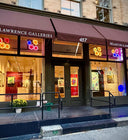
New York, New York
457 West Broadway
212-995-8865
Mon – Sat: 10:00am – 7:00pm
Sun: 11:00am – 7:00pm
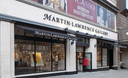
San Francisco, California
366 Geary Street
415-956-0345
Mon-Sun: 10am - 6pm
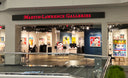
Schaumburg, Illinois
5 Woodfield Mall, Second Level Nordstrom Wing
630-954–3033
Mon – Sat: 10:00am – 9:00pm
Sun: 11:00am – 6:00pm